Recipe: Mor Kozambu aka Buttermilk Gravy

IMG_6069
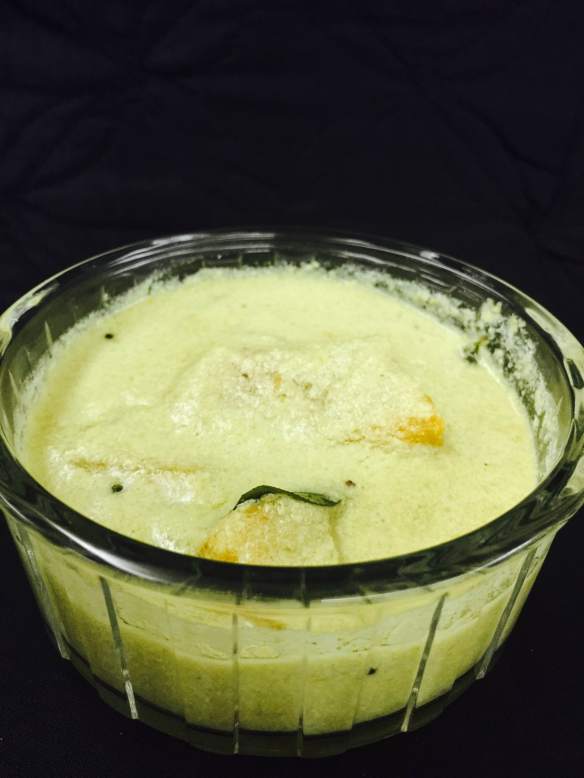
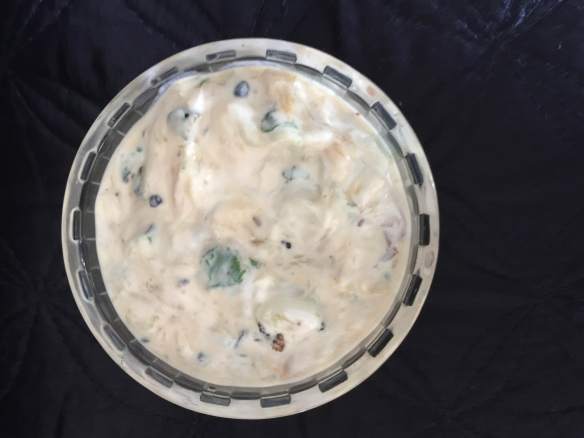
A very traditional south Indian dish, this is our version of Kadhi, a yoghurt based gravy, which is found almost all over India, in various avatars – the kadhis which you have in Gujarat and Punjab and the pitla from Maharashtra.

This is a very easy dish to make with minimal ingredients, which you can make with not much effort.

IMG_6071
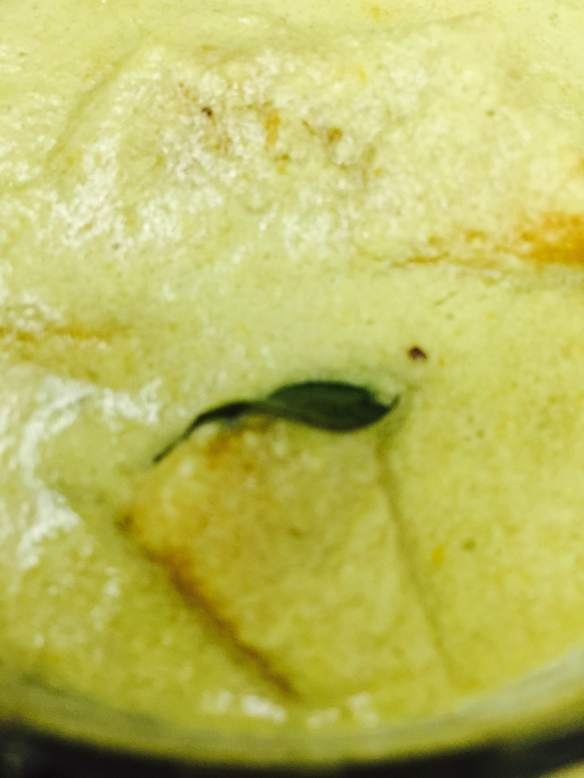
Mor Kuzambu or Buttermilk Gravy

Ingredients:

  • 2 cups yoghurt, thinned to a pouring consistency
  • 5-6 ladies fingers or Okra, cut into long pieces
  • 3-4 tbsps grated coconut
  • 5-6 green chillies (more or less depending on the spice intensity or your ability to take the heat)
  • 1 tsp cumin seeds
  • 2 tbsps oil (any vegetable cooking oil)
  • 1 tsp mustard seeds
  • ¼ tsp turmeric powder
  • Salt to taste

Method:

  • In a pan, warm the oil and add the mustards. When the mustard seeds pop, add the chopped ladies finger and turmeric powder and let it cook till it is crisp. You can also add a tsp of salt to lightly salt the okra.
  • When the ladies finger becomes crisp, switch off the gas and keep aside.
  • In a blender, add the coconut, chillies and the cumin seeds and blend until smooth. Use the yoghurt to add moisture to blend.
  • When smoothly blended, add it to the fried okra and let it cook.
  • Add some more of the thinned yoghurt to bring it to the consistency you like (think or thick) and once the whole gravy comes to a rolling boil, switch off the gas and remove from the flame.
  • Serve with rice and a vegetable of your choice.
  • Enjoy yummy Mor Kozambu

Notes: Instead of Okra, you can also use orange pumpkin, white pumpkin or even potatoes to make this gravy.

IMG_6070

Recipe: Semiya/Vermicelli Payasam (Dessert)

IMG_6073
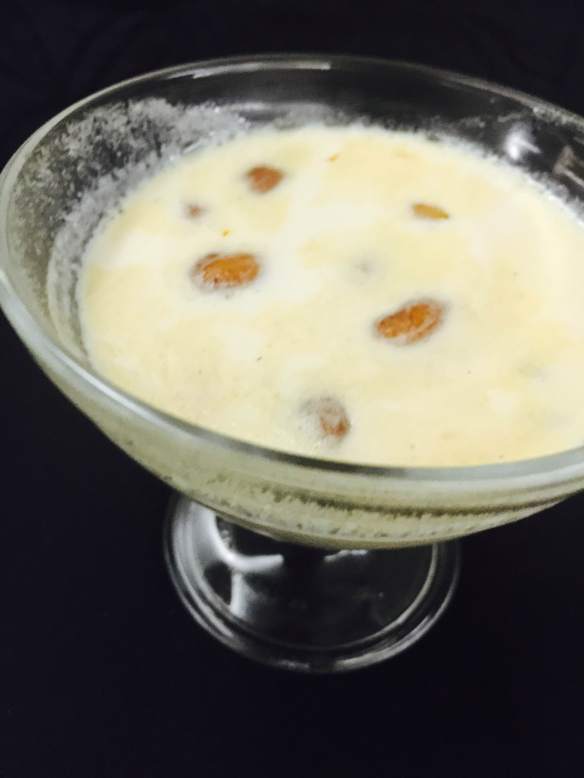
This sweet is the favourite of everyone at home, especially the children and is my go-to recipe when I need to whip up a sweet for any festival. GG & BB love it so much that I have to hide some for S, otherwise, he won’t get any when he comes home from work! This is a very easy recipe but takes a little bit of time stirring if you want to get the rich taste.

IMG_6072Semiya/Vermicelli Payasam

Ingredients:

  • 1 cup vermicelli
  • 1 cup sugar
  • 1-litre milk (full cream is the best for taste)
  • 10-12 pieces cashew nuts (chopped into half)
  • 2 tbsp raisins
  • ½ tsp cardamom powder
  • 2 tbsp ghee

Method:

  • In a deep bottom pan, heat the ghee and when it warms, fry the raisins till they plump up and keep aside in a kitchen towel.
  • In the same pan, fry the cashew nuts until they turn brown and crisp and remove into the same kitchen towel.
  • With the remaining ghee, fry the vermicelli till it becomes brown and starts to develop an aroma.
  • At this point, pour 1/3 to half a litre of milk and let it come to a rolling boil. Reduce the flame and let the milk and vermicelli boil until the vermicelli is completely cooked. This will take between 15-20 minutes. If at any point, the milk reduces, add some more milk to cover the vermicelli.
  • When the vermicelli is completely cooked, add the remaining milk and let it come to a nice rolling boil.
  • Now add the sugar and let it boil for a while until the sweet has thickened.
  • Add the sugar, cardamom, saffron and the nuts and let it boil for another 5 minutes.
  • Remove from the flame and let it cool before serving.
  • This sweet is very tasty both hot or cold, but we prefer to drink it cold. A few hours in the fridge really improves the taste dramatically.

Tips:

  • If you want to increase the proportions, just remember to put the sugar and vermicelli in a ratio of 1:1.
  • I prefer to use a pestle and mortar to grind my cardamom on an ‘as I need it‘ basis. I feel that grinding a whole bunch of cinnamon at the same time makes the smell of the spice go away after a while. You will need the pods from 5-6 cardamoms to make up ¼ tsp of the powder.

Recipe: Vegetable Pulao

IMG_6049
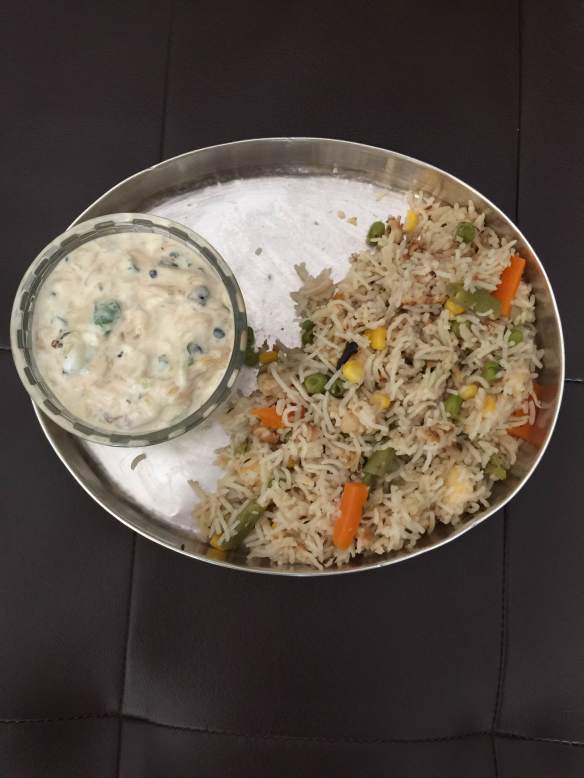
An easy one-pot meal, this pulao can be put together when you are in a hurry. This is the perfect meal for a bachelor to make as it does not need many utensils as well as a lot of skills to make it.

This also makes a perfect school or work packed lunch. You can also prep this the night before and if you are using a rice cooker, keep it in the cooker to cook overnight. Then in the morning, you have fresh pulao all ready for you before you leave for school or work!

Vegetable Pulao

IMG_6047Ingredients:

  • 1 cup basmati rice, washed and soaked for 15 minutes
  • 1 cup chopped mixed vegetables (I used potatoes, carrots, cauliflower, broccoli, green peas and sweet corn)
  • 2-3 tablespoons frozen paneer refreshed in hot water for 10 minutes
  • 1 onion, sliced thinly
  • 1 tsp cumin seeds
  • 1 bay leaf
  • 4-5 cloves of cardamom
  • 3-4 cloves
  • 1-star anise
  • 10-15 cashew nuts, chopped
  • 2 tsp golden raisins
  • 2 green chillies, chopped
  • 1-inch piece of ginger julienned
  • Salt to taste
  • 1 tsp ghee

Method:

  • Wash the rice well and remove all the water and keep aside.
  • Heat a pan and when it is warm, add the ghee. When the ghee liquefied, add the cumin seeds and when the seeds pop, add the bay leaf, cloves, cardamom and star anise. Stir each for a few seconds before adding the next ingredient.
  • Add the green chillies and ginger and stir well.
  • Add the cashew nuts and the raisins and stir for a few seconds.
  • Next add the onions and stir, letting it become translucent.
  • Next, add the chopped vegetables and stir well. Add the washed and drained rice next along with the salt and stir well, letting the salt coat the rice grains and vegetables.
  • Remove from the flame and put this mixture into a rice cooker and add the water (normally I add ¾ cup water to 1 cup of Basmati rice, but you can play with it depending on the rice you use)
  • When the rice is done, fluff with a fork and serve with any gravy or a raita.

IMG_6050

IMG_6049

Recipe: Cucumber and Okra (Ladies Finger) Raita

IMG_6051
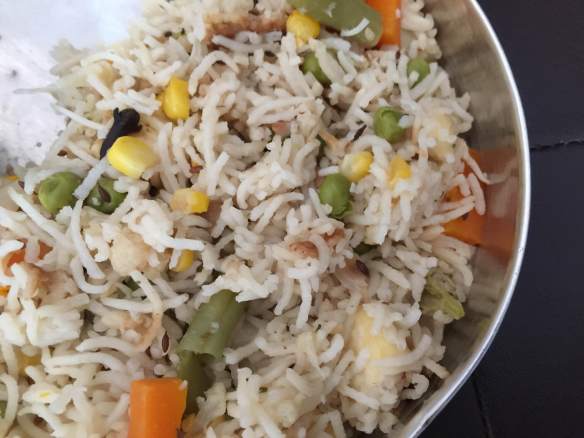
A couple of days each week, I need to send BB & GG to school with a packed lunch as they have to stay back in school for either CCA or supplementary lessons.
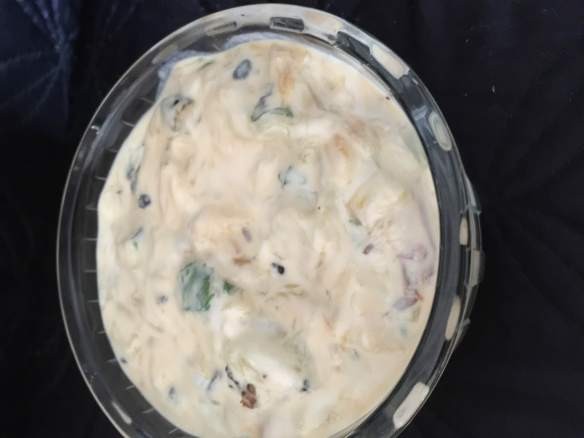
Most days it’s either some sort of stuffed paratha or some sort of rice. So making appropriate accompaniments with that then becomes important.

I made a vegetable pulao recently and was thinking of something to accompany that when I thought of marrying two kinds of raitas to come up with this raita. The Okra or Ladies Finger Raita is a traditional south Indian raita (called pachadi) and we make the Cucumber raita quite often at home. It was surprisingly good and goes very well with any kind of rice or roti.

Cucumber and Okra (Ladies Finger) Raita

IMG_6052Ingredients:

  • 2 large cucumbers
  • 10-15 okra or ladies finger washed and dried thoroughly
  • 2 cups yoghurt, beaten well
  • 2 green chillies
  • 1-inch piece ginger
  • 3-4 tbsps oil
  • 1 tsp cumin seeds
  • Salt to taste
  • Coriander leaves to garnish

Method:

  • Peel and grate the cucumber and salt it lightly and keep aside for a while.
  • Slice the ladies finger as thin as you can and keep aside.
  • Slice the green chillies and ginger finely and keep aside.
  • Heat oil in a pan and when warm, fry the chillies and ginger till they are crisp. Remove and keep on some kitchen paper to remove all excess oil.
  • In the same oil, fry the okra till it becomes brown and crisp.
  • Remove from the pan and put on the kitchen paper to remove excess oil.
  • In a large serving bowl, beat the yoghurt and add salt to taste.
  • Squeeze the grated cucumber with the palms of your hands to remove all excess water and add to the beaten yoghurt.
  • When the fried okra, chilli and ginger are cool, add to the yoghurt cucumber mixture.
  • Heat another dry pan, and add the cumin seeds and let them pop. When the cumin seeds are crisp, add them to the yoghurt mixture.
  • Garnish with coriander leaves and serve cold.

IMG_6053

Recipe: Chawli aka Black-eyed Beans Masala

IMG_5905

Black eye peas, Chawli in Marathi or Lobia in Hindi is a small bean which is used in cooking almost in every part of the country. This is made differently in various parts, but the way I make it, is very similar to how I make Rajma.

Chawli Masala

IMG_5908Ingredients:

  • 1 cup dried black-eyed peas,  soaked in water overnight
  • 2 onions, chopped
  • 2 tomatoes, chopped
  • 5-6 cloves of garlic
  • 1-inch piece ginger
  • 1 tsp cumin seeds
  • 1 tbsp oil
  • Salt to taste
  • 1-2 tsp red chilli powder
  • 1 tsp coriander powder
  • 1 tsp cumin powder
  • 2 tsp garam masala masala
  • Coriander leaves to garnish

Method:

  • Wash the black-eyed peas thoroughly and cook it in a pressure cooker for 4-5 whistles till it becomes soft. You can also cook it without pressure, in a pan, but it will take quite long.
  • Chop the onions and tomatoes and peel the garlic and ginger and chop them into pieces.
  • Heat oil in a pan and when warm put in the cumin seeds. When it starts popping, add the garlic, ginger and stir for a few minutes. Then add the onions and stir and cook till they turn translucent.
  • Add the tomatoes next and a tsp of salt to help the tomatoes start watering. Let the tomatoes cook till they are mushy and well cooked.
  • Switch off the gas and let it cool completely. When cool, blend it till it becomes a smooth puree.
  • In the same pan, pour this puree and let it boil. When it comes to a rolling boil, add the cooked black-eyed beans, chilli powder, cumin powder, coriander powder and garam masala powder. Check for salt and add more if needed.
  • Let this cook well and once the whole mixture is nice and thick, switch off the gas and garnish with coriander leaves
  • Enjoy piping hot Chawli with Cumin (Jeera) rice, Rotis or Nan.

IMG_5909