Recipes: Red Chilli Chutney

I love having chutneys in the house and will have one or more lying around at any point in time.

A couple of weeks back, while making veggie burgers with my Mixed Veg Kofta recipe, I played with this recipe and found one that suits me! Don’t be fooled with the name, though its made from red chillies, it’s not as fiery as the name suggests.

This chutney is made from fresh, largish red chillies which are not spicy. I suspect they will be very nice with red peppers also, though I’ve not yet tried them with them.

red-chilly-959567

Fresh red chillies

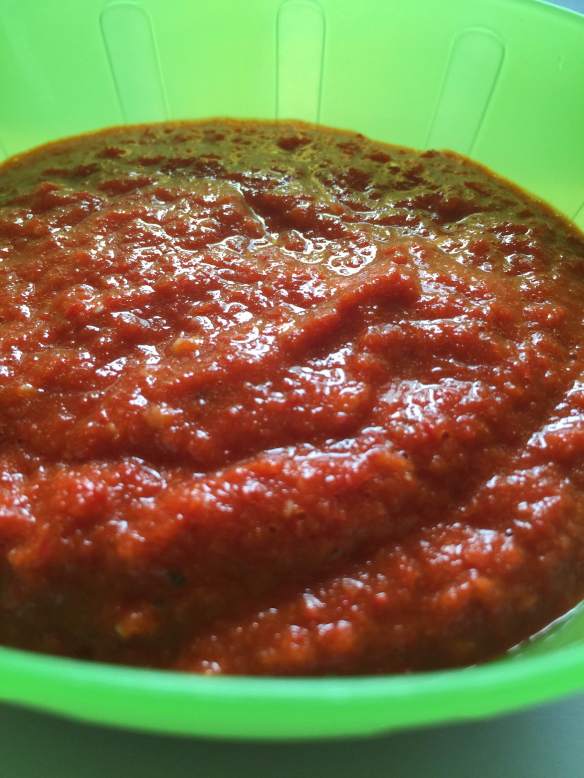
Fresh Red Chili Chutney

IMG_5357Ingredients:

  • 1 cup fresh red chilies, chopped into large chunks
  • 2 onions, chopped into large pieces
  • 10-12 cloves of garlic
  • 1 large handful of raisins, soaked in warm water for a while
  • Salt to taste
  • 1-2 tbsps lemon juice

Method:

  • In a blender, using the water used to soak the raisins, blend all the ingredients except the salt and lemon juice.
  • Use water sparingly to keep the chutney thick.
  • Add salt and lemon juice and blend till you get the consistency you want.

This chutney is amazing with bread and also goes very well with chats and and any fried food like samosa, pakoras etc. The chutney was not very spicy and the raisins helped cut the spice factor even more. If you can take a lot more spiciness, you can reduce the amount of raisins, or increase the chili amount.

IMG_5358

IMG_5359

Diwali Recipes: Coconut Barfi

IMG_5052

Another typical recipe, this one also needs a good bit of stirring so a good arms workout with this one!

IMG_5053
Ingredients:

  • 2 cups grated coconut
  • 1.5 cups Sugar
  • ½ tsp Cardamom Powder
  • 1 cup Water

Method:

  • Take a big plate or cake tin and grease it slightly. Or, you could lightly spray it with oil and then put baking paper over to completely cover it, this reduces the amount of ghee used in the recipe slightly.
  • For this recipe, you need only the white part of the grated coconut. If you plan to grate your own, stop at the point when the brown part starts getting grated. Or you could do what I did, which was to buy freshly grated coconut from your local Indian store.
  • In a pan, saute the grated coconut till you get a nice aroma from it. Do not let it brown. Remove it from the pan and add the sugar and water and let it come to a rolling boil. You can also add a couple of teaspoons of milk to the mixture so that any dirt in the sugar comes up and you can remove it. This trick also makes the barfi more white which is aesthetically more pleasing. At this point, reduce the flame and let it boil till it thickens to a single string consistency.
  • This means that when you take a drop of the mixture from the flame and touch it with your thumb and index finger, it will stick to both fingers and form a kind of string.
  • When the sugar mixture reaches this point, add the grated coconut and stir for a couple of minutes. Add the cardamom powder and continue to stir at a low to medium flame. When the coconut completely absorbs the sugar water mixture and starts to leave the sides, it’s time to take it off the flame. You can also test it by putting a couple of drops in the greased tray. If it stays in shape, it’s time to remove it from the flame, otherwise continue stirring and repeating this step till you get to this point.
  • Switch off the gas and pour it into your prepared greased plate. Using a clean spatula, level the mixture and make it smooth. Let it cool for a while and when still slightly warm, lightly score lines in the mixture with a knife or pizza cutter. You could cut squares or diamonds in any size. Let it cool completely before transferring to an airtight container. This should be good for a week or so outside and slightly more inside the fridge.

IMG_5056

Recipe: Raw Banana Stew aka Vazhakkai Kootu

IMG_5061

This is one of my favourite kootus, the tanginess combined with the slight sweetness that jaggery imparts along with the crispy coconut flavouring is just yum! I love to eat it as it is, no rice or anything else needed to dress it up for me!

It’s quite versatile also, if you make it a bit runny (like a sambar), it can be eaten with rice. Add some papads or chips to go with it and becomes a delicious meal. When made thicker, it becomes the perfect addition to your meal. Eat with with a rasam or a mor kozambu and lick your fingers!

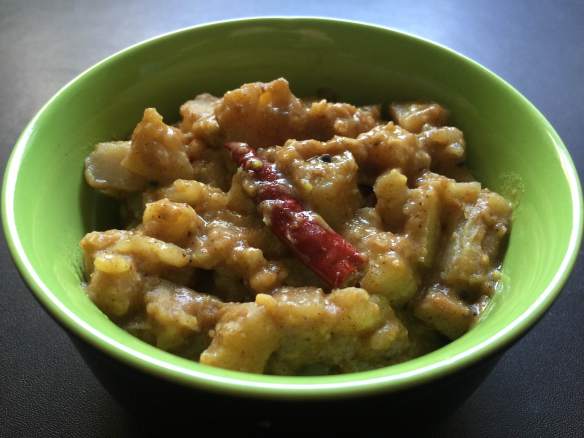
Vazhakkai Kootu

IMG_5064

Ingredients:
3-4 raw bananas (vazhakai)
3-4 tbsp Toor Dal
1 small lime sized tamarind
2-3 tsps Sambar powder
1.5 tsps oil
1 tsp mustard seeds
1 tsp chana dal
1 tsp broken urad dal
2-3 tbsps coconut
3-4 dried red chillies
1 pinch asafoetida
2 tsps jaggery
Salt to taste

Method:

  • Wash the toor dal and soak it in a some hot water for 10-15 mins. After that pressure cook it and keep aside. Once you can open the cooker, mash the dal well so that it is even.
  • Soak the tamarind in hot to warm water for a while (depending on the size, it should take 20-30 mins). Once it’s soft and cool, mash it with your fingers and extract the juice. You can run it through a seive to make sure you don’t have any fruit in the juice extracted. Alternatively, just buy tamarind paste which is easily available in most Indian stores.
  • In a pan, add the oil and once it is hot, add the mustard seeds. When the seeds begin to crackle, add the chana dal and fry till it starts to change colour. Do not let it get black, as it will then become bitter. Then add the dried red chillies and a pinch of asafoetida and lastly the grated coconut. Keep frying the cocounut until it starts to lose moisture and becomes brown. When the coconut is brown and crisp, remove from the flame and keep aside. We will use this in the end.
  • Peel and chop the raw bananas into small pieces. The pieces should be slightly larger than bite-size. Peel and chop one by one as otherwise the bananas will blacken. While peeling, you can keep a container with water next to you and drop the bananas into it while cutting the next one. This slows the blackening process.
  • When you have chopped all the bananas, cook them in a pan with just enough water to cover them. When the bananas are half cooked, add the tamarind juice to the pan along with sambar powder and salt to taste.
  • Let the tamarind water in the pan come to a rolling boil and let it boil for 5-10 minutes untill the banana is fully cooked. Bananas usually cook very fast so make sure you do not over cook them.
  • Once the bananas are cooked, add in the mashed dal and check for salt. If you want, you can also add the jaggery at the point.
  • When the dal has mixed well with the mixture add the coconut, give it a good stir and switch off the flame.
  • Garnish with a bit of coriander leaves and your delicious vazakkai kootu aka raw banana stew is ready!
  • Serve with rice or rotis for a delicious meal…

Recipes: Thippili Rasam

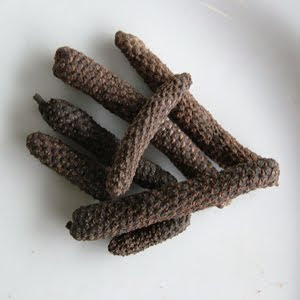
One of the forgotten spices in India, Thippili or Long pepper is no longer used in Indian cooking. This amazing ayurvedic medicinal plant or spice has so many benefits that once I started using it, I actually wondered why people were not incorporating it into their cooking.

According to Wikipedia, this spice has been referred to in ancient texts of Ayurveda. It reached Greece in the sixth or fifth century BCE, though Hippocrates discussed it as a medicament rather than a spice. As peppers are wont to be, these are very useful in curing or suppressing coughs and colds.

My kids call this rasam as “Medicine Rasam” and love it when they are sick. You can also drink it as a soup when you don’t really feel like eating and having this on a rainy day is bliss!

It’s not a very difficult recipe, with the biggest challenge being to get the Thippili. You should be able to get it in any Indian stores. There are different versions of the rasam and here’s how I make it…

Thippili Rasam

IMG_4685

Ingredients:

  • 1 small lemon sized ball of tamarind, soaked in warm water
  • 6-8 sticks of Thippili
  • 1/2 tsp whole black pepper
  • 1 cup Toor dal, cooked till it is mushy
  • 2 tbsps Coriander seeds
  • 2 tsps Cumin seeds
  • 4-6 dried Red Chillies (this depends on the spice intensity of the chillies plus your spice tolerance)
  • a pinch of Asafoetida
  • 1-2 tsps jaggery (you can omit this or use brown or white sugar as a substitute)
  • 1 tsp mustard seeds
  • 8 – 10 curry leaves
  • 1 tbsp ghee
  • 1-2 tomatoes

Method:

  • Soak the tamarind in warm water, then squeeze it out and run the water through a seive to get tamarind water. Discard the paste which is left behind.
  • In a pan, heat 1 tsp of ghee and lightly fry the thippili, coriander seeds, 1 tsp cumin seeds and red chillies. Once cool, blend it into a smooth paste along with the tomatoes.
  • Next mix together the tamarind water, asafoetida, salt and jaggery and start boiling it. Once the raw smell of the tamarind goes away, add the ground paste and continue boiling. After 10 mins, add in the cooked Toor dal and continue to boil for another 10 mins.
  • In a seperate, smaller pan, put the remaining ghee and heat it. Then add the mustard and balance cumin seeds. When the seeds pop, add the curry leaves and a pinch of asafoetida. Stir for a couple of seconds, switch off the gas and pour this seasoning over the rasam.

IMG_4686

Delicious Thippili Rasam is ready. Eat with rice or by itself as a soup!

Milagu Kozambu (Pepper Sauce)

My Bible and go-to book for everything in traditional Iyer cooking is the “Cook and See (Samaithu Paar)” series by S. Meenakshi Ammal. The series of three book was originally written in the late sixties/early seventies. I refer to them all the time, especially when I want to make traditional food. This book takes the place of calls to my mum, especially since international calls are so expensive!

The recipe I made today is Milagu Kozambu or Pepper Soup as Meenakshi Ammal calls it. I am copying the recipe exactly as it was in the book and I made it also the exact same way it said in the recipe.

Milagu Kozambu

(This recipe prepares 1 cup)

 Ingredients:

  • 1 tsp Peppercorns
  • 6 Red Chillies
  • 1 tsp Black Gram Dal (Urad Dal)
  • 2 tsps Bengal Gram Dal (Chana Dal)
  • ½ tsp Cumin Seeds
  • 2 tsps Coriander Seeds
  • 1 tsp Mustard Seeds
  • Tamarind as big as a small piece of lime
  • Salt
  • A handful of curry leaves
  • Asafoetida
  • Oil

 Method:

Heat oil in a kadhai and fry peppercorns, red chillies, Bengal gram dal, 1 tsp black gram dal, cumin seeds and coriander seeds. When the dals turn red, add the curry leaves and fry till the curry leaves are crisp. At this point, add the asafoetida. Grind to a smooth paste with the tamarind, salt and a little water. The paste should be very smooth.

Heat oil and fry 1 tsp mustard seeds and 1 tsp black gram dal. Mix the paste with enough water to make 1.5 cups of the paste. Add this to the oil and let it cook on a slow flame till it reduces to 1 cup.

This kozambu will keep for about 2 days outside and about a week in the fridge. Eat with hot rice and some papad. So soul satisfying on a cold or rainy day!