Recipes: Methi Palak Dal

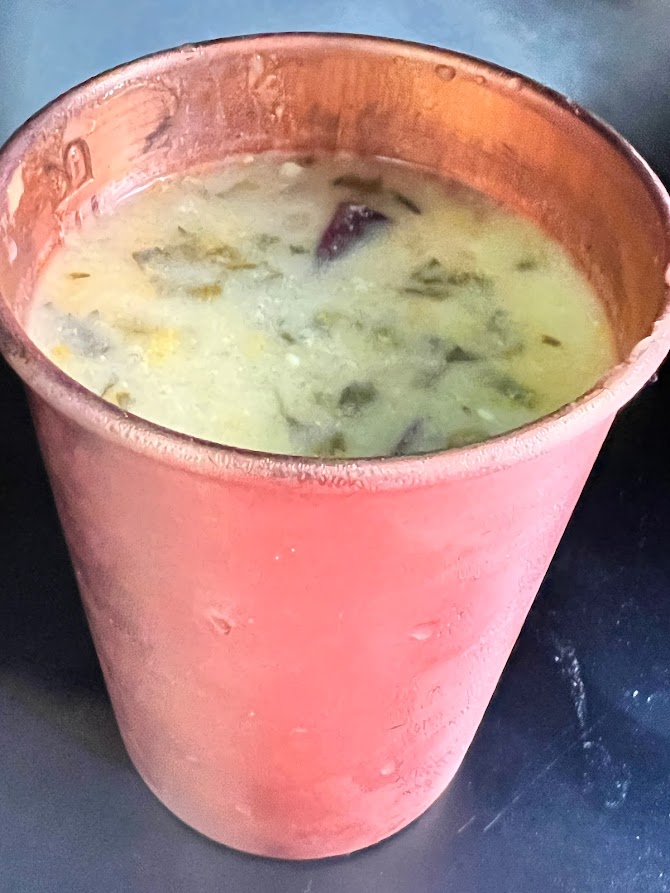
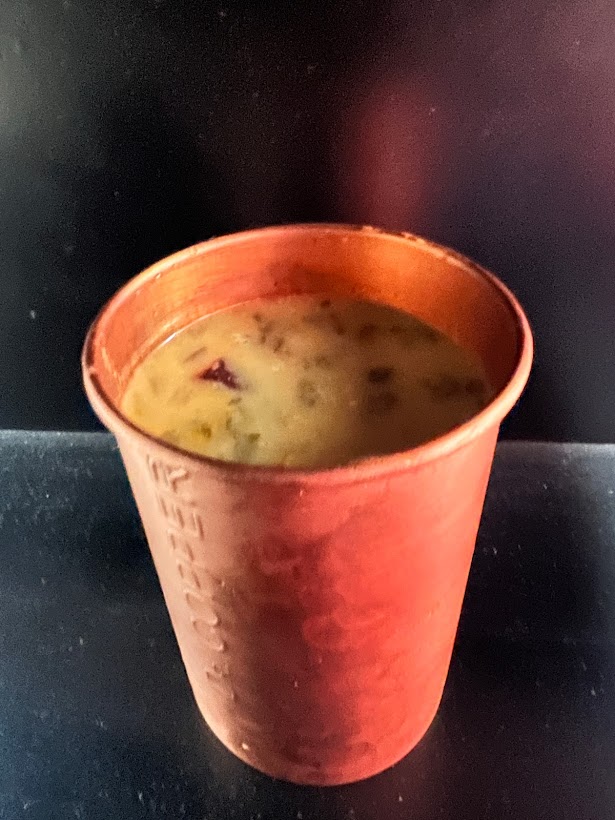
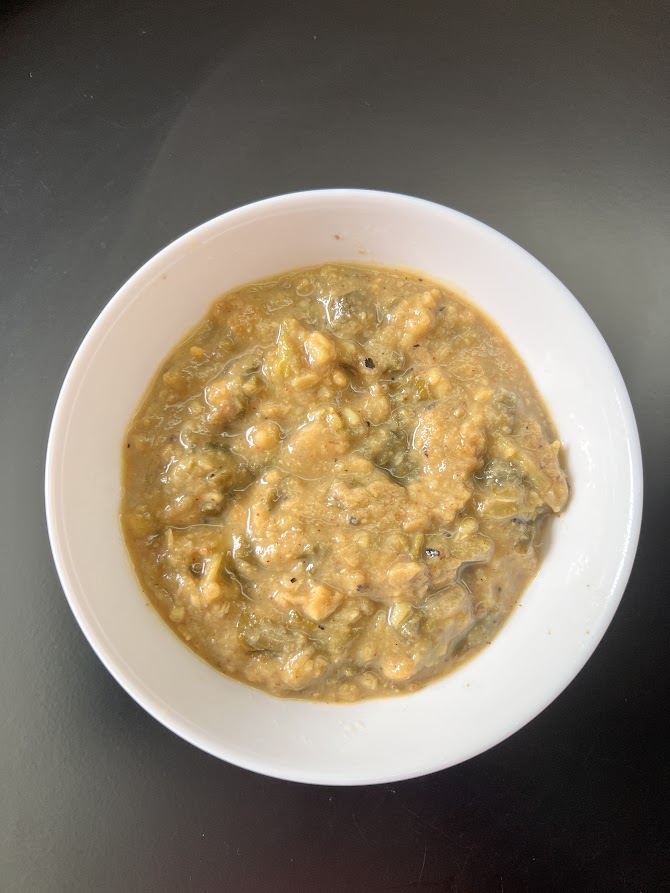
I’ve blogged about dals many times previously and here’s another one today. I had some fresh methi leaves and so instead of making it into a sabzi or kneading it into a dough for methi parathas, I thought of adding it to a dal with some fresh spinach. The result was a super yummy dal that kept well even when we had it the next day.
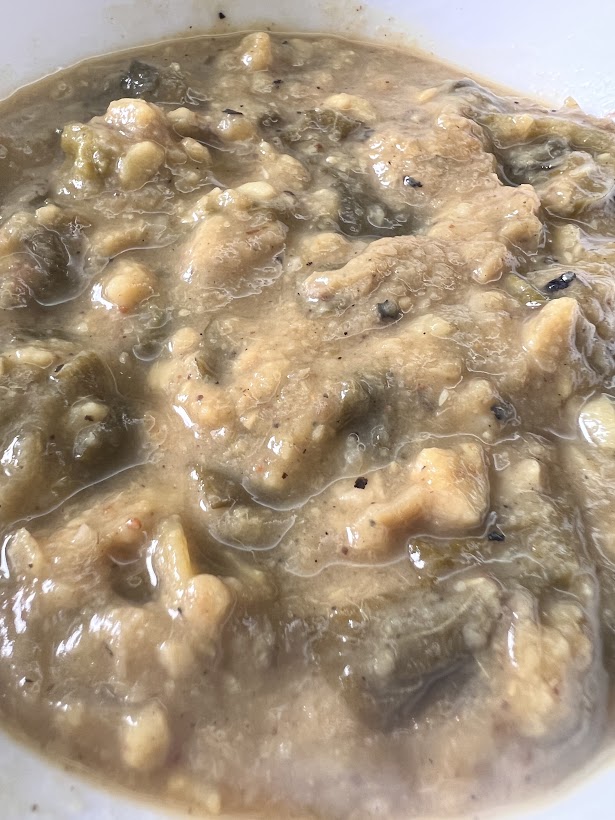
Methi and Palak Dal

Ingredients:

  • 1 bunch of fresh methi or fenugreek leaves, plucked, cleaned and chopped
  • 1 bunch of fresh palak or spinach, cleaned and chopped
  • 1 large onion, finely chopped
  • 1 bulb garlic, peeled and minced
  • 1 large tomato, finely chopped
  • 1 cup yellow moong dal, washed and soaked in water for 15-20 minutes
  • 1 tbsp ghee or oil
  • 1 tsp cumin seeds
  • ½ tsp green chilli paste or 1 tbsp finely chopped green chillies
  • 1 tsp red chilli powder
  • 1 tsp coriander powder
  • 1 tsp garam masala powder
  • 1 tsp jaggery (optional)
  • 1 tbsp lemon juice
  • Salt to taste

Method:

  • Soak the chopped spinach and methi in some water so that any dirt gets to the bottom. Wash it well and keep it aside.
  • In a pressure cooker, heat the ghee and oil and when warm, add the cumin seeds. Let the seeds pop and then add the garlic and saute for a few seconds.
  • Then add the minced garlic and saute for a few seconds.
  • Now add the finely chopped onions and saute till the onions turn translucent.
  • When the onions are translucent, add the finely chopped tomatoes and some salt and let the onions cook.
  • When the tomatoes start to turn mushy and are fully cooked, add in the chopped greens and saute till the greens start to wilt.
  • At this point, add in the soaked dal and add salt, jaggery, red chilli powder, coriander powder and garam masala.
  • Add in water to cover the dal, close the cooker and cook it for three whistles. If you are cooking on a stovetop, cook until the dal is completely cooked and the dal is completely dissolved.
  • Open the pressure cooker and mash the dal and greens together and switch on the flame again
  • Adjust seasonings and add water to bring it to the consistency you desire and when you are satisfied with the taste and consistency, switch off the flame and add the lemon juice.
  • Serve hot with rice or rotis or any Indian flatbread.

Recipes: Paneer Butter Masala

A restaurant favourite, Paneer Butter Masala is a staple in pretty much every Indian restaurant, even those not serving north Indian food. A mild but creamy dish made with lots of butter and ghee with onions, tomatoes and cream and paneer is the star of the show.

I had been thinking about making this for a while and finally made it a couple of weeks back. But please do not stint on the liberal use of ghee and butter, so this is something you can make for a special occasion or when you have guests over. You can also make the gravy ahead of time and freeze it. I also made a double batch of the gravy, froze some and make a mixed veg curry with uit which was equally yummy. Everyone loved the recipe so much I already got requests to make it again.

Paneer Butter Masala

Ingredients:

  • 1 cup frozen paneer, soaked in hot water for 15 minutes and then drained
  • 3 medium-sized onions, chopped
  • 5-6 medium-sized tomatoes, chopped
  • 200 ml cooking cream
  • 1 bulb of garlic, peeled
  • inch piece of ginger, peeled and chopped
  • 15-20 pieces of cashew nuts, soaked in hot water for 15-20 minutes and drained
  • 4-5 tbsp ghee
  • 3-4 tbsp butter
  • 3-4 cloves
  • 3-4 cardamom pods
  • 3-4 fresh or dried red chillies
  • ½ tsp turmeric powder
  • 2 tsp red chilli powder (or to taste)
  • ½ tsp garam masala powder
  • 1 tbsp kasuri methi
  • Salt to taste
  • Coriander leaves, finely chopped to garnish

Method:

  • Heat half the butter and ghee in a pan and when the butter melts add in the cloves and cardamom pods and saute for a few seconds.
  • Then add in the cumin seeds, onions, garlic, red chillies and ginger, sauteing for a few seconds before you add the next ingredient.
  • When the onions start becoming translucent, add in the cashew nuts and let the nuts start to soften.
  • Then add the tomatoes and a pinch of salt and let the tomatoes and cook until the tomatoes are completely cooked and mushy. Remove from the flame and keep aside to cool completely.
  • Once this mixture is completely cool, blend to a fine paste, adding water as needed. Make sure the paste is completely fine and there are no bits of anything left. Use a strainer if needed otherwise, the recipe will not be restaurant quality. Keep aside.
  • In the same pan, heat the balance ghee and butter and pour the tomato paste into the pan. Season with salt, red chilli powder and turmeric powder and stir well. This mixture will splutter a lot, so make sure you cover the pan and let the tomato paste, stirring at intervals.
  • When the tomato paste starts leaving oil on the sides, add in the cooking cream and crush the kasuri methi in the palms of your hand and sprinkle over the gravy. Add a bit of water to thin the gravy if needed.
  • Add the paneer cubes and gently stir so the paneer is completely covered by the gravy. Gently mix everything so the paneer pieces do not break.
  • Cook on low to medium heat for 5-7 minutes and then switch off the flame.
  • Garnish with finely chopped coriander leaves and serve hot with jeera rice, rotis or any Indian flatbread.

Recipes: Phirni

I like to think of Phirni as a sophisticated cousin of the Payasam. Also known as Kheer, Kheeri, Payesh, Payox, Payasam, Phirni is a sweet dish and a type of wet pudding, usually made by boiling milk, sugar or jaggery, and rice, although rice is sometimes substituted with dals, tapioca or vermicelli. It is typically flavoured with desiccated coconut, cardamom, raisins, saffron, cashews, pistachios, almonds, or other dry fruits and nuts and is typically served as a dessert. The word kheer is derived from the Sanskrit word for milk, ksheer and is also the archaic name for sweet rice pudding. The difference as I see between kheer or payasam and phirni is that payasam has whole rice grains cooked in it while Phirni has powdered rice, usually, Basmati added to it. Tasting great both hot and cold, we prefer it cold, but this is a personal preference.

Phirni

Ingredients:

  • ¼ cup basmati rice
  • 1-litre full cream milk
  • ½ cup sugar or as required
  • 10 to 12 almonds, blanched and peeled, keep about a tbsp for garnishing
  • 10 to 12 pistachios, blanched and peeled, keep about a tbsp for garnishing
  • ½ tsp cardamom powder
  • A large pinch of saffron strands
  • 2 tsp rose water

Method:

  • Rinse the basmati rice a couple of times in water. Drain the water and dry the rice by spreading them on a tray or plate. Let the rice dry completely and keep it aside.
  • Grind the rice in a grinder till the consistency resembles fine semolina or couscous and keep the ground rice aside.
  • In a small bowl, add the nuts, add boiling water to it and keep aside for about 30 minutes.
  • After 30 minutes, drain the water and let the nuts cool slightly. Peel the nuts and slice or chop them finely and keep them aside. Keep aside about 1 tbsp each of the almonds and pistachios for the garnish.
  • Heat milk in a thick-bottomed broad pan.
  • When the milk starts to boil, take 1 tbsp of the milk into a small bowl, add in the saffron strands and stir it until the saffron dissolves and the milk becomes a lovely orange colour.
  • Let the milk in the pan reach a rolling boil, lower the heat and add the ground rice. Stir and add the sugar.
  • Cook the ground rice in the milk on low to medium heat on the pan with the pan uncovered and keep stirring at intervals so that the milk is completely lump-free.
  • Add In the cardamom powder, almonds, pistachios, cardamom powder and saffron-infused milk.
  • Stir and cook for another five minutes, or a bit more until the Phirni thickens and the rice granules are softened and cooked completely.
  • Switch off the flame and drizzle the rose water.
  • Garnish it with the reserved chopped nuts and cover tightly and let the Phirni cool down.
  • Once the Phirni is cool, refrigerate until it becomes cold and serve cold as a dessert. It should stay for 2-3 days in the fridge, but I doubt it will last that long!

Recipes: Dahi Dal aka Yogurt Dal

I have been mulling about this recipe ever since I saw something like this on social media. And I recently got a chance to play around with this recipe. I had some leftover dal which was not enough to make an actual dal, I was saving it to make rasam but decided to make this instead. This is actually a very simple recipe and takes hardly any time to make, especially if like me, you already have the prepared dal.

Dahi Dal aka Yogurt Lentils

Ingredients:

  • 1 cup prepared moong or toor dal
  • 1 medium-sized onion, finely chopped
  • 1 cup beaten yoghurt
  • 2 tsp gramflour or besan
  • 1 tsp cumin seeds
  • 2 dried red chillies, broken
  • ¼ tsp turmeric powder
  • ½ tsp ginger paste
  • 1 tsp garlic paste
  • Salt to taste
  • 1 tsp sugar (optional)
  • 1 tbsp ghee or oil
  • 1 tbsp kasuri methi
  • Coriander leaves to garnish

Method:

  • Heat the ghee or oil in a pan and when it warms up, add in the cumin seeds and let the seeds splutter. Then add the dried red chillies and saute for a couple of seconds.
  • Then add in the onions and saute until the onions become translucent.
  • Now add in the ginger and garlic pastes and saute for a couple of minutes.
  • Beat the prepared dal till it is a creamy consistency and pour it in and let it come to a rolling boil.
  • In the meantime beat the yoghurt well with the gram flour so that there are no lumps.
  • When the dal is boiling, slowly add in the yoghurt and stir continuously so that the yoghurt does not start stringing.
  • Add salt and sugar to taste. Add more water to thin it as per preference.
  • Crush the kasuri methi in the palms of your hands and add it to the dal. Garnish with finely chopped coriander leaves and serve hot with rice or rotis.

Recipe: Pineapple Halwa or Pineapple Kesari

One of the simplest sweets, a kesari or Halwa is made of semolina or rava and is usually the go-to sweet in many South Indian households. Very simply put, a kesari is a sweet sweet upma.

The usual way to make a Kesari is to make it exactly like a plain upma and substitute salt with sugar. Most people add a bit of orange colour to get the distinctive orange hue. During Navaratri last year, I decided to make this on one of the days and added pineapple to it to make Pineapple Kesari. Because I didn’t have any colour on hand, I used a bit of saffron which is why my Kesari is pale cream or yellow. If orange or yellow colour is used, it would have a bright yellow colour.

Pineapple Kesari

Ingredients:

  • 1 cup semolina or rava, roasted
  • 1 cup sugar
  • 3 cups water
  • 4 tbsp ghee
  • 12-15 cashewnuts
  • 1 tbsp raisins
  • ¼ tsp cardamom powder
  • 1 tin canned pineapple
  • 1-2 drops natural yellow or orange colour
  • 1 large pinch saffron

Method:

  • Dry roast the semolina until it starts to emit an aroma. If it is already pre-roasted, you just need to dry roast it for a couple of minutes.
  • Boil the water in a kettle or pot and keep aside, letting it be boiling until needed.
  • Heat 2 tbsp ghee in the same pan in which the semolina was roasted and when the ghee becomes warm and fry the cashew nuts until they are golden brown. Drain the ghee and remove to a kitchen towel and keep aside.
  • Fry the raisins for a couple of seconds and remove and keep aside.
  • Keep aside some of the pineapple and chop it into tiny pieces and keep aside. Blend the balance pineapple into a fine puree and keep aside.
  • Heat 2 tbsp ghee and fry the pineapple pieces for a few minutes. Add in the puree and saute covered for about two minutes.
  • Now add the sugar and stir well. Add in the water and let the water come to a rolling boil. Add in any colour if you are using as well as the saffron.
  • Now add the roasted semolina and quickly stir so that there no lumps form. Add in the cardamom powder as well as the fried cashew nuts and raisins and stir constantly so that lumps are avoided. A rule of thumb I use is that to make the kesari slightly watery so that it does not harden as it cools. Once the water has been absorbed, cover and serve hot.

Notes:

  • If the kesari is cold, you can warm it slightly before serving as this sweet tastes better warm rather than cold.
  • If you are not using tinned pineapple, you will need to cook the pineapple pieces for a bit and soften it before adding the semolina.