Abbott FreeStyle Libre Review

“Awareness is the first step toward balance.”

When you live with diabetes, you quickly learn that no two days are ever quite the same. Some mornings feel steady; others are unpredictable. For years, I managed this dance with the help of finger-prick tests: tiny, fleeting snapshots of my glucose that left me guessing about everything in between.

I had heard about the Freestyle Libre and to be honest, I resisted it for a while because while I hated the needle pricks, I also didn’t want a needle poked into my skin for two weeks. But during my trip to Europe, I decided that I will take the plunge and decided to give the sensor a try to see if it made any difference to my glucose levels and if it changed the way I understand my body.

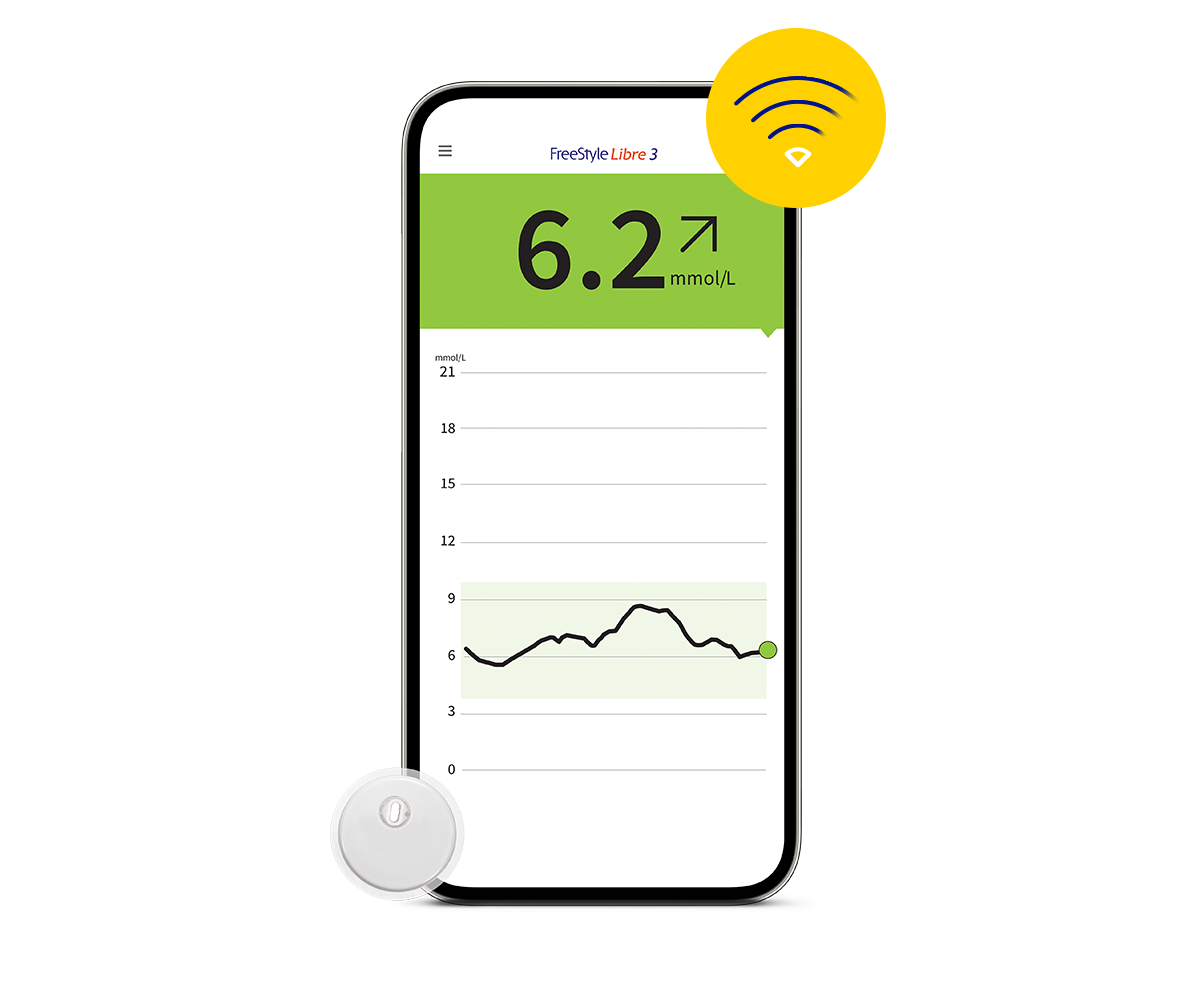
The Freestyle Libre is a continuous glucose monitor (CGM) developed by Abbott. About the size of a two-dollar coin, it’s worn on the back of your upper arm and stays in place for up to 14 days. Instead of pricking your fingers multiple times a day, you simply scan the sensor using the LibreLink app on your phone (or a reader device). Each scan instantly shows your glucose reading, a trend arrow, and a graph of your recent levels. Behind the scenes, the sensor quietly measures glucose in the interstitial fluid, the fluid between your cells, capturing readings every few minutes, day and night. When you upload your data to LibreView, the accompanying analysis platform, you see beautifully detailed charts of your glucose patterns: your highs, lows, daily rhythms, and how often you stay within your target range. It’s like turning your health data into a living, breathing story.

Before the Libre, my glucose management felt like reading a book with half its pages missing. I knew how things started and ended, but not what happened in between. With the sensor, I could finally see the full narrative of how my body responded to meals, exercise, stress, and sleep. I started noticing gentle morning rises, calm mid-afternoons, and occasional evening peaks. These weren’t “bad numbers”, they were clues.

For those in Singapore, Abbott has an Experience Centre where you can try the sensor for SGD 10. I signed up and went down to their Experience Centre at Raffles Place. I was the only one that session, so I got a one-on-one session with the lady doing the session. She gave me a sensor, showed me how to put it on and also ran a few videos on the sensor. You can also purchase sensors there at a discount and they had a scheme that if you purchase 3 sensors within three months, you get a free sensor. It’s an excellent way to see how the device feels, how the app works, and what kind of data you’ll receive before committing to regular use.For anyone who’s ever felt unsure about CGMs, it’s a low-cost, no-pressure way to experience the technology firsthand, and to understand how empowering it can be.

I had already decided to go the subscription route, so didn’t buy from the experience centre. I subscribe to two sensors every four weeks and according to their website, if you pay for five months, the sixth month is frew. You can also opt to receive two sensors every eight weeks. The plan allows you to pause or cancel if your needs change, giving flexibility alongside the convenience.

On to my experience with the sensor. I began experimenting: adding a handful of nuts to breakfast, taking short walks after dinner, and noticing how hydration and rest made a difference. The feedback was almost immediate. A smoother curve on the graph often mirrored a calmer, steadier day.

One of the most powerful things about using a CGM is how it connects daily choices to visible outcomes. For instance, I learned that foods I assumed were harmless sometimes caused unexpected spikes, or that meals rich in fibre and protein kept my glucose beautifully stable, and stress and lack of sleep could nudge levels up even on perfect food days. Instead of guessing, I was finally learning. The Libre didn’t judge; it simply showed patterns, and with each pattern came understanding.

Every so often, I noticed dips, usually in the early mornings or after long gaps between meals. They weren’t severe, but they were informative. The data reminded me to plan better, to carry small snacks when I’m on the go, and to listen to my body’s subtle cues before they became loud alarms. Over time, I became attuned to these rhythms. The more I observed, the more intuitive the whole process felt, like tuning in to my body’s quiet language. There’s something deeply empowering about turning invisible fluctuations into visible information. Instead of worrying about what might be happening, I could see it, and respond thoughtfully. The emotional shift was subtle but profound: I stopped thinking in terms of “good” or “bad” readings. I began thinking in terms of patterns, habits, and adjustments. That shift, from judgment to curiosity, is what changed everything. I wasn’t trying to control my body; I was learning to work with it.

From a practical perspective, the Freestyle Libre fits seamlessly into daily life. Application is quick and nearly painless, a gentle click on the back of the arm, and it’s done. The sensor stays on through showers, workouts, and sleep; after a while, you barely notice it. To scan, just hold your phone near the sensor for a second. No lancets, no fuss. The LibreLink and LibreView apps are beautifully designed. The graphs are clear, colourful, and easy to understand even for someone who isn’t data-minded.

But the sensor sometimes falls out, sometimes even as early as less than a week of usage. But Abbott Singapore has been very good about replacing faulty sensors. You just have to call them or let them know through their website, and they will send you a replacement sensor. The only caveat is that you have to send them the faulty sensor. This is not only for them to check the sensor but also to avoid people misusing this facility and scamming them.

I didn’t expect this little patch to become a mindfulness tool, but it did. Each curve on the graph became a reminder to slow down, breathe, and be kinder to myself. Instead of frustration, I found fascination. Watching my glucose stabilise after a calm morning walk or a wholesome meal gave me a quiet sense of accomplishment.

After more than three months of using the Freestyle Libre, I can confidently say this: it’s more than a monitor; it’s a mirror, one that reflects the connection between how you live and how your body responds. It doesn’t replace intuition; it deepens it. And it turns the daily task of managing diabetes into something gentler, more insightful, and even, in its own quiet way, beautiful. The Freestyle Libre gave me not just numbers but understanding. And with understanding comes peace.

Will I continue using it in the long term? Probably yes. As of now, I can afford the price of about SGD 200 per month, but if that price point becomes expensive, I may consider using two sensors over eight weeks.

If you’re considering using it, you’ll learn more about your body in a few weeks than in years of occasional testing. It’s discreet, painless, and surprisingly easy to use. The data may surprise you, but it will empower you.

The Korean 10-Step Skincare Regime

Source

I normally don’t post about beauty or skincare and so if I am right, this is a first for me!

But I have been hearing a lot about Korean skincare products and makeup and some time at the beginning of this year, I decided to start a night-time skincare ritual and soon realised that I had already subconsciously incorporated the ten steps.

Living in Singapore means having easy access to Korean and Japanese skincare and beauty products, most of which are highly affordable. This means a lot of the skincare products I use are from these countries. I am a little wary about Japanese and Korean makeup as the colours may not suit my south Asian skin, being more geared to east Asian skin. I like their skincare products because I believe that skin types are pretty much similar across races and so this meant that I could use Korean and Japanese skincare products and also start doing the 10-step skin care.

The 10-Step Skincare method refers to the number of products layered onto the skin one by one. A lot of people (including me) are initially put off by the sheer amount of time that we think this process will take. But after two months of diligently doing it, I can confidently tell you that it does not take more than 10 minutes (more if you are putting on a mask).

Although there are a total of 10 steps in this beauty ritual, most of the time you do between 6-8 steps on any given day or night. It is quite rare that someone does all the steps all the time. The steps change depending on your skin type as well as any seasonal changes where you live. Since I live in the tropics, my skincare regime does not change through the year, but if you are inspired on doing the 10-Step Skincare Regime after reading this post, then please do take note of seasonal changes and your own skin type when you embark on this journey.

So what’s the Korean 10-Step Skincare Routine?
The 10 steps commonly associated with this regime are:

  1. Oil cleanser
  2. Foam/cream cleanser
  3. Exfoliation
  4. Toner
  5. Essence
  6. Treatments
  7. Masks
  8. Eye Cream
  9. Moisturizer
  10. Suncare/Lip Care

Step 1 and Step 2: Double Cleansing

Makeup removal and then cleansing with an oil cleanser is the mainstay of the Korean 10-step regime. Not only are oil cleansers relaxing to use, but applied to dry skin, they also remove all makeup and other oil-based product debris like sebum, sunscreen and pollution particles. You can also massage your skin as you oil cleanse which will stimulate the surface of the skin, preparing it for the products you’re about to apply. It also drains lymphatic glands in your face and neck that can cause puffiness.

Cleansing twice is recommended by dermatologists as it helps to thoroughly remove all impurities that can cause breakouts. Water-based cleansers dissolve the water-based impurities such as dirt and sweat that your oil cleanser didn’t pick up.

I normally don’t use make-up, so generally skip this step, moving straight to my normal cleanser. On days when I do apply some make-up, I usually will use micellar water to remove the make-up before cleansing with my usual foam or cream cleanser.

Step 3: Exfoliation

Exfoliation not only cleans out clogged pores, but it also sloughs off dead skin cells. When you remove this dull layer of cells, brighter skin is revealed. Regular exfoliation will also help your other skincare products absorb and work more efficiently. This step is not recommended for daily use. If you have sensitive skin, you’ll only want to exfoliate once a week. If you have a tougher complexion, you can do it more regularly (about three times a week).

I usually exfoliate around three times a week.

Step 4: Toner

In Korean skincare, toners are typically a thin layer of moisture meant to regulate your pH and soften your skin, preparing it for the steps that will follow. Toners remove any leftover residue from the cleansers while also repairing your skin’s barrier to effectively absorb the moisturisers that follow. Toners also balance the skin’s pH levels, otherwise, the skin can become dry and dehydrated.

I usually apply toner by pouring some in the palms of my hand and then patting it on my skin. I also very lightly slap my skin to help the toner melt into the skin and prep it for the next step.

Step 5: Essence

One of the keys to the glowy results of a regular Korean skincare routine is layering products. Rather than relying on one thick cream to do all the work, Koreans believe that layering products allow the skin to breathe and avoids clogging the pores. So if you think of your toner as the first layer of moisture, think of the essence as the second. These products are typically also thinner in texture, and some even feel watery. They penetrate the skin at a deeper level and aid with the absorption of the products to come.

I pretty much use the essence the same way I use the toner, which is pouring a small amount in the palms of my hands and patting it in with very mild slaps.

Step 6: Treatments

This step includes boosters, serums and ampoules. Packed with powerful ingredients, they target specific skin concerns such as acne, fine lines and hyperpigmentation. This is where you get to play with what you need for your skin. You could also use multiple treatments on the same day, depending on what your skin requires or if you already have perfect skin, you can ignore this step.

I generally use two treatment serums daily, a vitamin C serum and another treatment depending on what my skin needs. I pour a bit in my palms and then pat the serums on my skin. I normally wait for a couple of minutes before the next treatment.

Step 7: Masks

If essences are the heart of Korean skincare, masks or specifically sheet masks are the soul. The key to sheet masks is the sheet, which when in prolonged contact with your face, allows the skin to fully absorb the nutrients and moisture. The purpose of the mask is to give your skin what it needs. Korean sheet masks are also very affordable, especially where I live and it’s very easy to amass a huge stash.

I usually flit between sheet masks and other traditional wash off masks. If I am using a wash off mask, then I do it right after cleansing and before toning. If using sheet masks, then it comes here, in step seven.

Step 8: Eye Cream

The eye cream is not unique to the Korean skincare routine, but it is one of the hardest products to consistently use because it’s more a preventative product if you’re under the age of 40. The eye cream is designed to moisturize the ultra-thin skin around your eyes where crow’s feet and fine lines are bound to appear. However, if you use eye cream regularly before they show up, you’ll see a marked difference in how old you look (or in this case, how young!)

I miss this step more often than I do it, so this post is a reminder for me to do this step more consistently.

Step 9: Moisturiser

More moisture you may be thinking, but in the traditional Korean beauty 10-step routine, you use a cream – also known as an occlusive layer – to seal in all the layers before it. Think of it as making a fragrant stew and putting the lid on the pot. It allows the fragrances and flavours inside to mingle and absorb, which is a lot like what all the luscious ingredients you layered are doing in your epidermis when you add a moisturizer.

I usually use a facial oil and then any normal moisturiser in this step during the day. During the night, I use the facial oil plus a sleeping mask, which I use as a moisturiser since I sleep in an air-conditioned room and I have super dry skin which the air conditioning makes drier.

Step 10: Sun Care/Lip Care

We all know that we should always wear sun protection, even if we are inside the house. It’s the easiest and most effective way to prevent skin cancer as well as ageing that comes from the sun’s harmful rays. It should be the last step, just before you start applying make-up so that it does not get diluted by other skincare products.

I try to use sunscreen as the last step in my morning ritual. This is another step I am sometimes guilty of skipping, especially if I am going to be at home the whole day. But I will make sure I don’t do that and use SPF daily.

In the night, I use a heavy lip balm to finish up my Korean 10-Step Skincare ritual before calling it a night!

My thoughts on doing this diligently for slightly over two months now is that it no longer seems a chore to me now as it was when I first started doing it. Previously, I used to sometimes skip doing a night-time skincare ritual if I was tired or sleepy, but now it’s a part of what I do at night before sleeping, the same as brushing my teeth. It does not take very long to do, I timed it last night and it took me less than 10 minutes to do all steps excluding exfoliation and masking. So to those who are intimidated by the sheer number of steps, take heart that it will become simpler as you continue doing it.

Was this post useful? Did you learn something new? Are you using a skincare regime which is similar to the Korean one? Would love to hear comments, so please write and comment below.

Product Review: King Koil Shiatsu Massage Pillow

Since the time we came back from India in mid-December, I had been having real bad neck and shoulder pain when I woke up in the morning and this pain used to continue to a good part of the day. It was so bad, that it used to affect my entire day and I had to spam massage oils as well as muscle relaxants throughout the day just to get through the day.

At one point, S suggested that it may be my pillow which was the issue and asked me to check out some new pillows. I went online and checked some, but was put off by the price tags that some of the really raved pillows had.

That weekend, I took the children shopping and on a whim went to a department store to look at pillows. There I chanced the King Koil range which was on a good offer and tried them in the store. I liked it and decided to buy a couple since they were on a 75% off offer. I bought the pillow for S$68 while the retail price was around $200 (can’t remember the exact price now). This is the most expensive pillow I have ever owned in my life and while buying, I was a bit sceptical whether such an expensive pillow will help me in any way.

I’ve been using them now for slightly more than a month now and so decided to review it here. Both S and I have been using it and I have a more positive experience than him.

I am a side sleeper while S is a back sleeper. I feel this pillow is more helpful to side sleepers than back sleepers as the contours of the pillow are more suited for a side sleeper. To a back sleeper, the curve is slightly higher and may not be as comfortable.

The pillow is touted as a 100% visco elastic material for space technology and has an aloe vera treated fabric cover. It is an elastic memory foam pillow which keeps its shape and also helps alleviate neck and shoulder stress, stimulates blood circulation and restores vital energy. The pillow also has small massage ball-like indents in the pillow which give your neck a massage as you sleep.

The dense material of a memory foam pillow prevents aches in your neck and does not allow it to bend in awkward directions and also keeps your spine aligned and moulds itself to the shape of your head. These will also retain its shape even after many months of usage and will not need fluffing regularly.

I’ve been enjoying using my massage pillow for the last month or so and have a positive feeling. My neck and shoulder pains are almost gone and I wake up quite fresh daily. Another good side-effect of this pillow (for me at least) is that I fall asleep quite fast at night. Previously it used to take me a minimum of 15-20 minutes to fall asleep after I switch off all electronic devices and keep my book aside and switch off the light. I also used to wake up a minimum of twice per night, but these days this has reduced to once or even none on most days!

I highly recommend this pillow, but only if it is under $70. At the original retail price I saw at the department store, I would not buy it. So if you do find a good deal on this pillow, splurge a little, especially if you suffer from neck and shoulder pain like me; it will do you a world of good!

Sleep

77bad0a0bd30b40d5f8221b20282333c

Bedtime, for BB and GG at 12 and a half years on school nights is between 9 and 9:30 pm. Last week, one night when i was hounding them to bed, both said that they sleep the earliest among their friends and classmates. Most people their age, according to them, slept around 10 pm on school nights and even midnight and beyond on weekends and holidays.

I’ve always believed that in order to function at 100% capacity the next day, an adult has to have a minimum of 7-8 hours of sleep the previous night and this increases for children (including teens). So I set out to show GG & BB why I ask them to sleep early, especially on school nights and this post is all the research I did and my findings….

Stress Worry Woman with Text on White

Sleep plays probably one of the most important roles in allowing us to function as normal, functioning human beings! Not getting enough sleep can impair mental and physical health as well as the quality of life. Worse, it makes you make wrong judgments in life (both mentally as well as physically) which leads to safety issues, for you as well as the people around you. We’ve all read, heard or seen many accidents which take place because people didn’t have enough sleep or how someone was diagnosed with a chronic disease where the real underlying cause was inadequate sleep!

For children, growing and otherwise, sleep is incredibly important as that is the time, when their brain cells work overtime to help them grow, both physically as well as mentally. Scientists believe that too little or not enough sleep in children can affect growth as well as their immune system. This is true for both young children as well as teens.

the-importance-of-sleep-before-your-exams_537341377350b_w450_h600
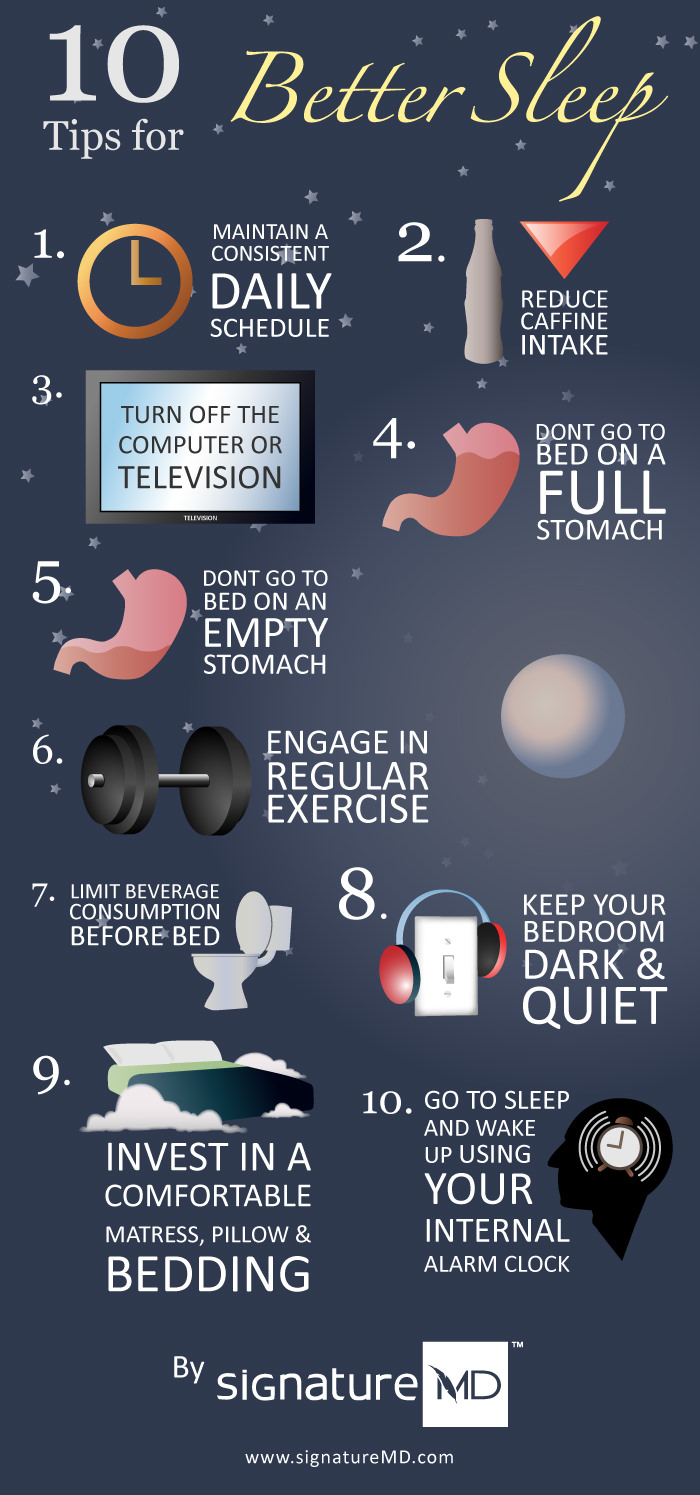
It has also been researched that loss of sleep or not having enough sleep can cause students not to do well academically. This is true, not only the night before a big exam, but also on a day-to-day basis when a student has to be alert and perform in class. I read that research has proved that after two weeks of sleeping six hours or less a night, students feel as bad and perform as poorly as someone who has gone without sleep for 48 hours. Sleep is also very important for learning and memory and motor tasks as research has proved that students who slept better did better in these tasks than those who did not get the required amounts of sleep.

However, it’s not the quantity of sleep, but also the quality of sleep that is important. So even if a student has his full complement of sleep, but this is fractured, disturbed or otherwise not in full REM mode, he will not be fully alert the next day.

One report I read for this post says that studies have shown that factors such as self-reported shortened sleep time, erratic sleep/wake schedules, late bed and rise times, and poor sleep quality have been found to be negatively associated with school performance for adolescents from middle school through college. Thus, there is ample evidence to indicate that the lack of adequate nighttime sleep can lead to disturbances in brain function, which in turn, can lead to poor academic performance.

So given how important sleep is for everyone, especially students, what do we do to get a good night’s sleep?

10-tips-for-better-sleep-infographic

Go to bed early and at a consistent time: Students need around 9-10 hours of sleep daily, but given the constraints on their time, I seriously don’t think they get enough, but even if we put an adult’s requirements on them, they need at least eight hours of sleep. So try to work backwards from your wake-up time and go to bed 8-9 hours before that. If you need time to fall asleep, take that time also into account.

Use the bed only for sleeping: Don’t read, study, watch TV or study on your bed. Your mind needs to associate the bed with sleep only and so by avoiding all other activities on the bed, it becomes easier for the mind to wind down and start sleeping once you actually get into bed.

Limit naps: Naps during the day, and especially closer to bedtime will play havoc with your sleep and circadian rhythms. If you must nap, don’t sleep for more an hour and try to wake up at least 6-7 hours before your bed-time.

Sleep-ins during the weekend: Don’t try to catch up on sleep during weekends. Try to stick to the same schedule as during the week as this may throw your schedule out of sync otherwise and Monday morning will be pain to wake up.

Caffeine: Avoid caffeine in any form after 3 pm. Caffeine stays for a long time in your system and make it hard to fall asleep. Although small portions of the population have no ill effects to caffeine, and if you are one of them, you should be ok!

Lights in the bedroom: Try and adjust the lights in your bedroom so that when you are ready to sleep, you are not blasted by bright lights which can try your mind.

Consistent meal schedule: Try to maintain a consistent eating schedule. Research says to have your last meal of the day two to three hours before bedtime so that your body has time to digest the food before sleep. This way your body is able to let you relax and sleep better.

Exercises: Exercising for a minimum of 30 minutes a day in the mornings allow you to become energized for the day and gives you deep and uninterrupted sleep at night. But remember not to exercise within three hours of bedtime as then exercise will stimulate your body, making it harder to fall asleep.

Stress and Anxiety: These are part and parcel in a student’s life and I assume a large proportion of students lose sleep because of stress and anxiety – about exams, a paper etc. Drink a glass of hot milk before bed as milk helps in managing stress. Also writing down what stresses you can make it go away from your head, at-least for the moment and lets you get good sleep.

Electronics Ban: Take some time to “wind down” before going to bed. Get away from all electronics (computer, television, mobile devices etc) 30 minutes before bedtime and let your body and mind relax with a good book. It’s very hard to do this and all of us are guilty of this almost all the time, but research has shown that being exposed to the blue light given out by electronic devices at night prevents our brain from releasing melatonin, which a hormone which regulates sleep. So the longer we are on electronic devices close to bedtime, the longer it will take us to actually sleep and this will affect both sleep quality and quantity, leading to all the issues at the beginning of this article.

I hope this post has been useful, especially if you need help in convincing your child that sleep is essential for him/her. I also spoke to GG after I finished my research for this post and asked her again about her friends. She replied they slept much less than her, but when asked if they were mentally present in class, as opposed to being just physically present, she replied in the negative and said most of them were zoned out or sleeping in class most times. This, more than anything else I said or could say in my defense of sleep seemed to have made a difference in how she viewed her sleep time!

Little Girls…or Miniature Women?

Ok, here’s a warning, rant coming on, so leave now if you want…

On Friday night, BB & GG had their music concert, which I wrote earlier. There I realised that most people found it very normal to put on make-up to their little girls – some as young as three and four!

My view about this is fairly straitforward – GG gets to wear make-up when she turns 15. If there are compeling reasons to wear make-up earlier, it will not be anytime before secondary school (13 or thereabouts) and then too it has be something very light – maybe lipgloss when she goes out. I am not discounting the odd make-up when is forced to wear it (like a performance in school etc), but in situations where it is not needed, I totally dislike it on young girls. According to me putting on chemicals on their faces now will lead to many problems later on in life. Also they are children, not miniature adults! Is there a need to make them look like adults so soon? Let them enjoy their childhood first. Are the parents even aware what is in the cosmetics that they are putting on their daughters? Have they read labels? This has the makings of their faces looking older than their real ages by the time they reach their mid-twenties. Even if the girls ask for it, isn’t it our jobs as parents to not let them do it?

The show on Friday was a very casual one with just the children who learn from this particular teacher and their parents. I saw girls with full make-up (by this I mean eyeshadow, eye liner, blush, lipstick and nail polish) while the others did variations of the theme. I think GG along with just 2-3 other girls was sans makeup at all. The colours used were the real dark colours like dark red and burgundy.

Another thing which gets my goat is the same young girls wearing shoes with heels. The same rule that applies for make-up applies for shoes for GG, although she has been longing for heels. When heels are said not be good even for adults, imagine what it would do to a young girl’s feet even before it has had a chance to fully grow!

Ok rant over, we can all go back to our lives now

What do you think about girls being allowed to wear make-up and heels before they should?